April 15, 2024
Machine installation is the beginning of the healthy progress of the entire system. This screen, which is an installation editor where equipment are combined, equipment properties are entered for better analysis and sensor locations are matched with the devices, has been redesigned for a better experience, allowing all information about the machine train to be entered at once and measurement strategy is determined. It also eliminated the difficulty of circulation between Connectivity and Machine Editor pages.
Machine Editor
Equipment Selection
As in the previous version, there is also an equipment library for setting up the machine train. By clicking on the Equipment Selection (shown with 1) area at the top of the page, the library panel on the right (shown with 3) can be opened.
Again, to facilitate machine installation, the photo gallery area where field photographs of the machine train can be uploaded is fixed at the bottom left of the editor (shown as 2).
To open the equipment information panel, click on any equipment on canvas or click on the Equipment Properties tab (shown with 4) from the top navigation area.

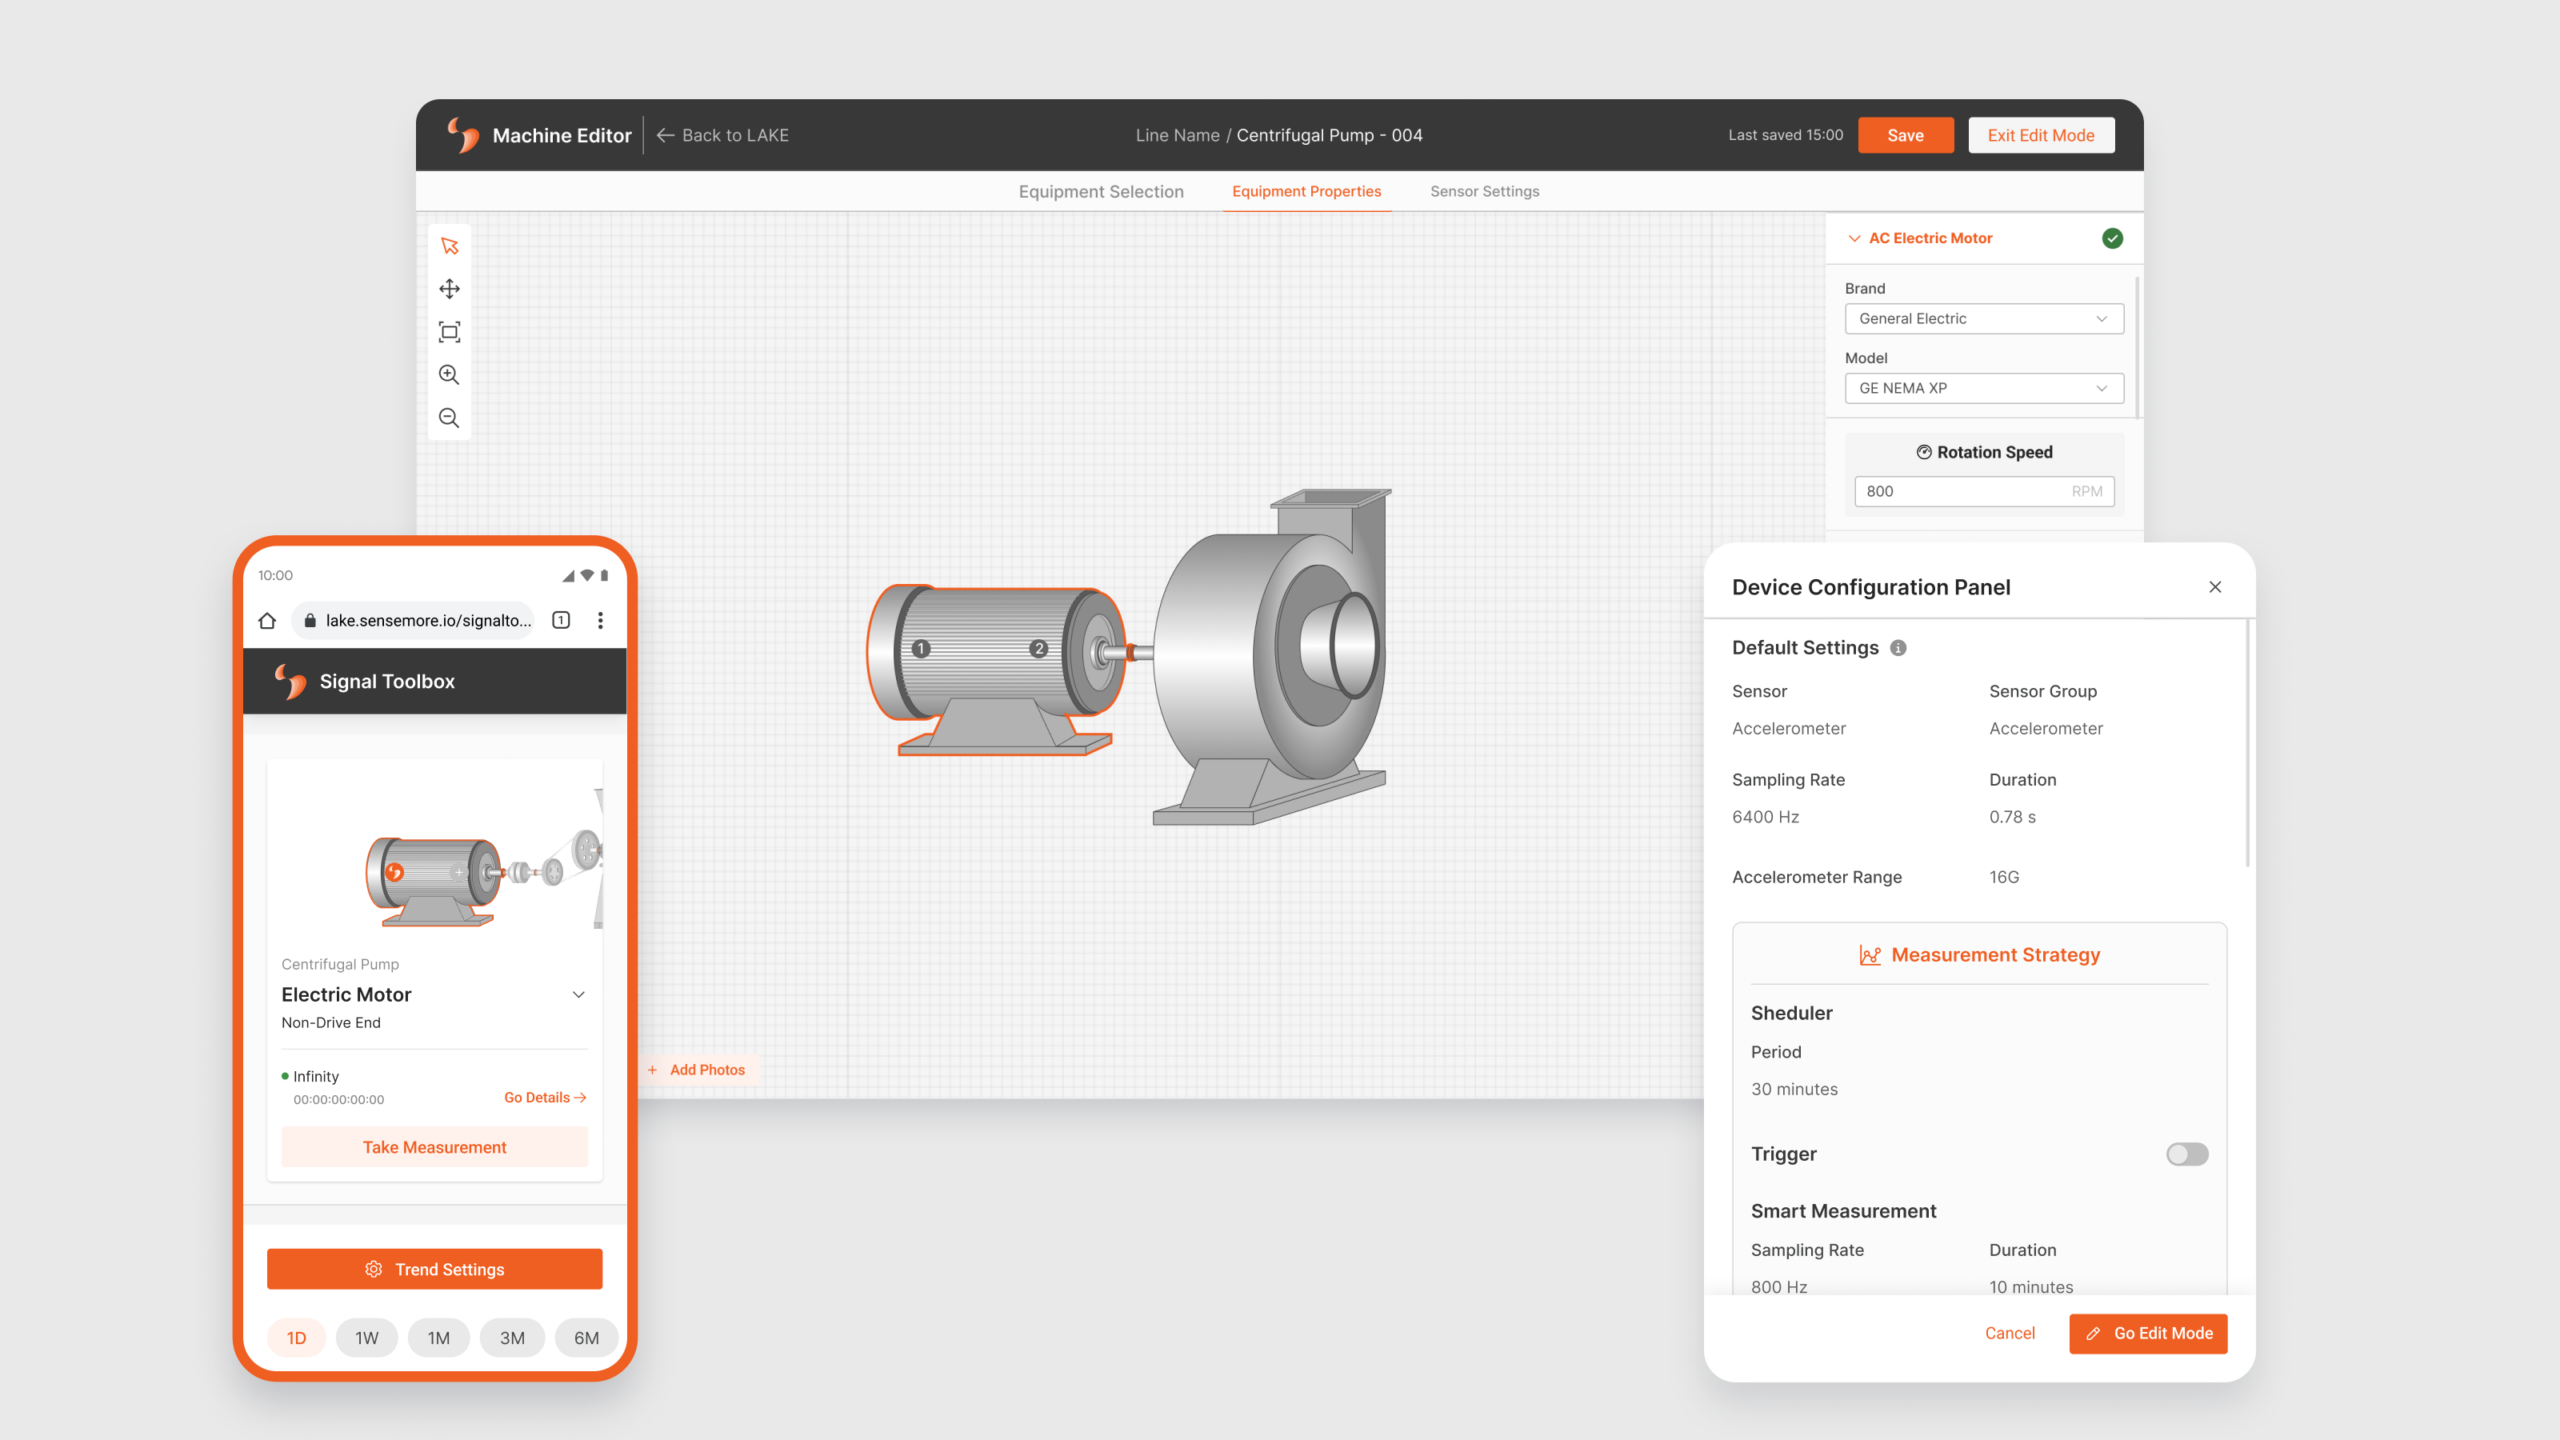
Equipment Properties
Selecting equipment adds an orange stroke around the selected equipment. This stroke shows that the property panel (shown with 5) of this equipment is open. When all the equipment information is entered, a green check icon appears next to the equipment name, while if all the equipment information is not entered, a red warning icon appears.
When you want to delete all entered equipment properties, the broom icon at the bottom of the information area (shown with 6) is used to delete all entered information about the selected equipment. Once the deletion process is confirmed, it can be undone within a certain period of time.

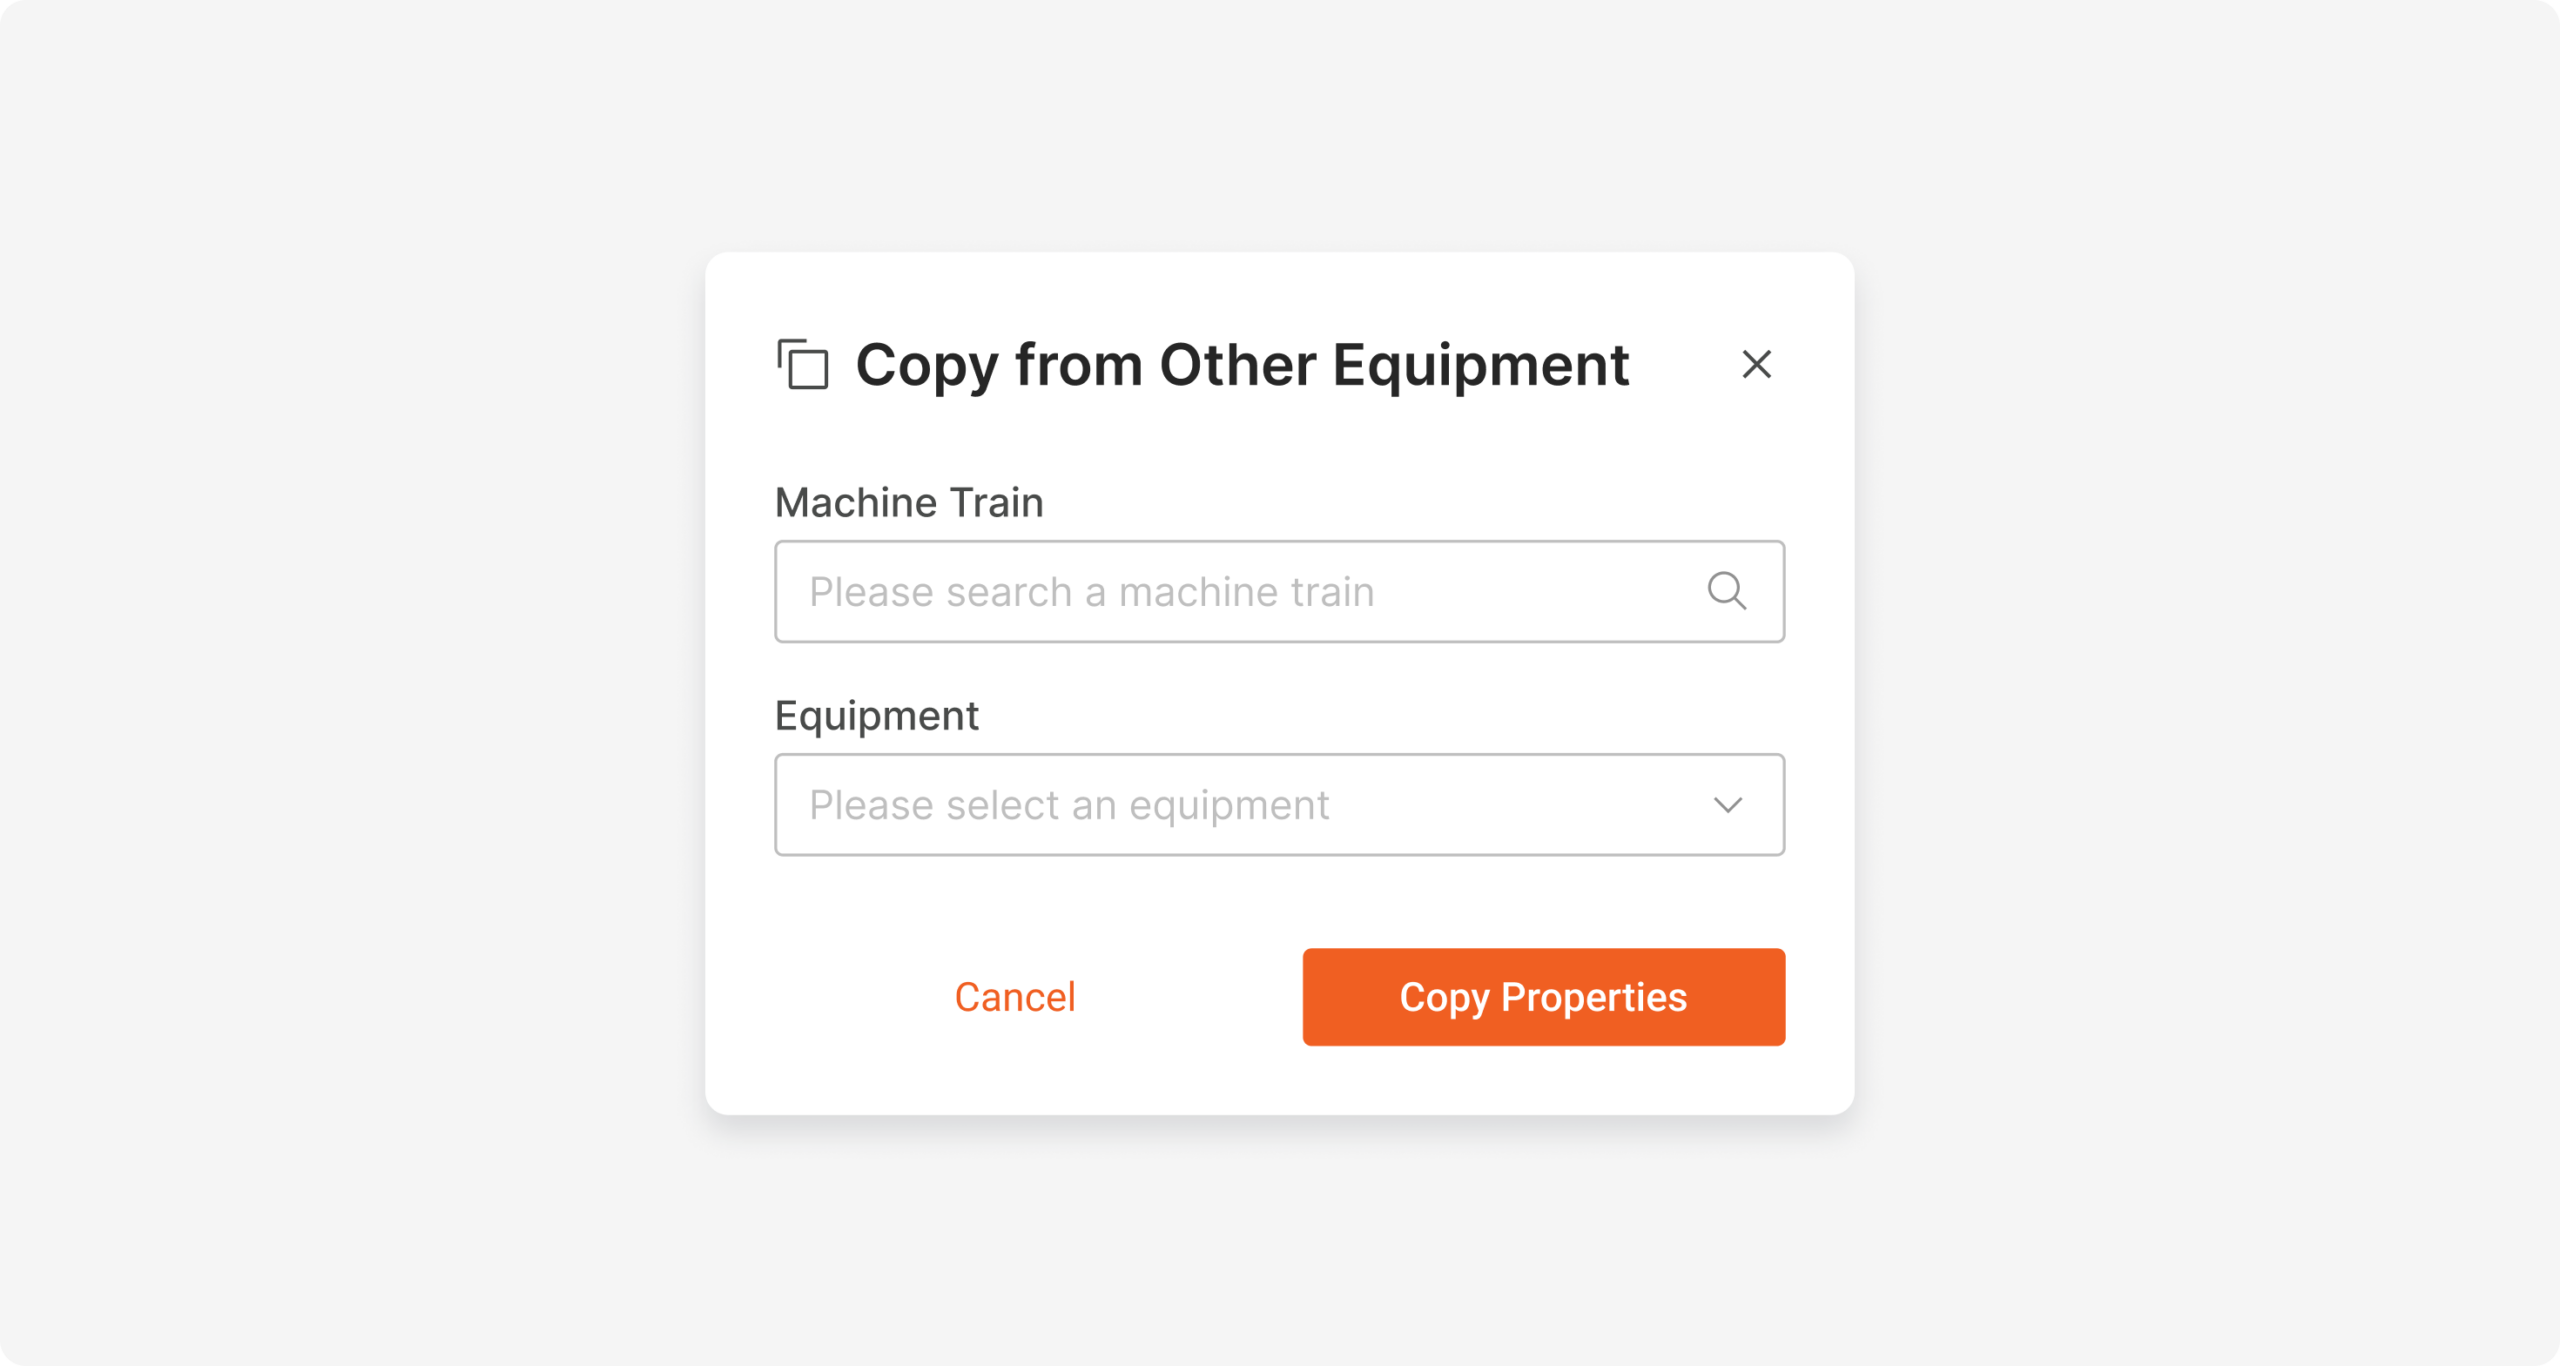
In order to speed up the installation process, the feature of copying information has been introduced to this area. By clicking on the “Copy from other equipment” button shown with number 7, properties can be copied directly from equipment that you know has the same properties on a different machine train, and then changes can be made.
Sensor Settings
To pair the equipment with the devices, you can click on the Sensor Settings tab from the top navigation area or click on the sensor point icons (shown with 8) on the equipment where you want to place the device. When you click on this area, the selected point turns orange and the sensor settings panel (shown with 9) for the selected point opens on the right.
To clear the data for the sensor point which settings such as device attachment and axis mapping have been made, selections can be cleared by clicking on the broom icon at the bottom of the panel (shown with 10) and confirming the window that opens.

The default settings of the devices are automatically selected. However, measurement taking strategies may vary depending on field and customer needs. Device configuration settings have also been added to this area, as these settings are rarely changed and are belonged to the machine train. This area can be accessed by clicking the Device Configuration Panel button shown with number 11 above.
The default settings of the device (shown with 12) are displayed at the top of the screen that opens, and they can be changed if desired. Measurement taking strategies (shown with 13) can be enabled by clicking on the toggle button and entering the settings opened for the feature you want to activate.

Edit Mode vs View Mode
Since all information entered in the editor of the machine trains is used in analysis and affects the incoming data, any changes that may be made accidentally are critical. For this reason, no changes can be made to the equipment or sensors without clicking the Edit Mode (shown with 15) button in the upper right corner of the page. But information about the equipments on the page and all associated devices can be viewed in View Mode.
To exit Edit Mode, you can return to View Mode by clicking the Exit Edit Mode button (shown with 14) at the top right of the page. The system warns if there are any changes made.

Mobile
Use LAKE as a Mobile App
The LAKE platform can be accessed from a phone or tablet, just like a mobile application.
What needs to be done for this:
a. You can access the login screen by typing lake.sensemore.io in the address bar and click on the menu icon.
b. Click on the Add to Home Page button from the menu.
c. The LAKE logo and name are displayed on the screen that opens and click the Add button.
d. Click the Add button in the window that opens to confirm.
Now the LAKE platform will look just like an application on the phone or tablet.

Navigation
A better experience can be achieved by completely replacing parts of the LAKE platform that are not suitable for mobile use. You can now access the menu tabs by clicking on the menu icon (you can reach it with 16) in the top navigation section.

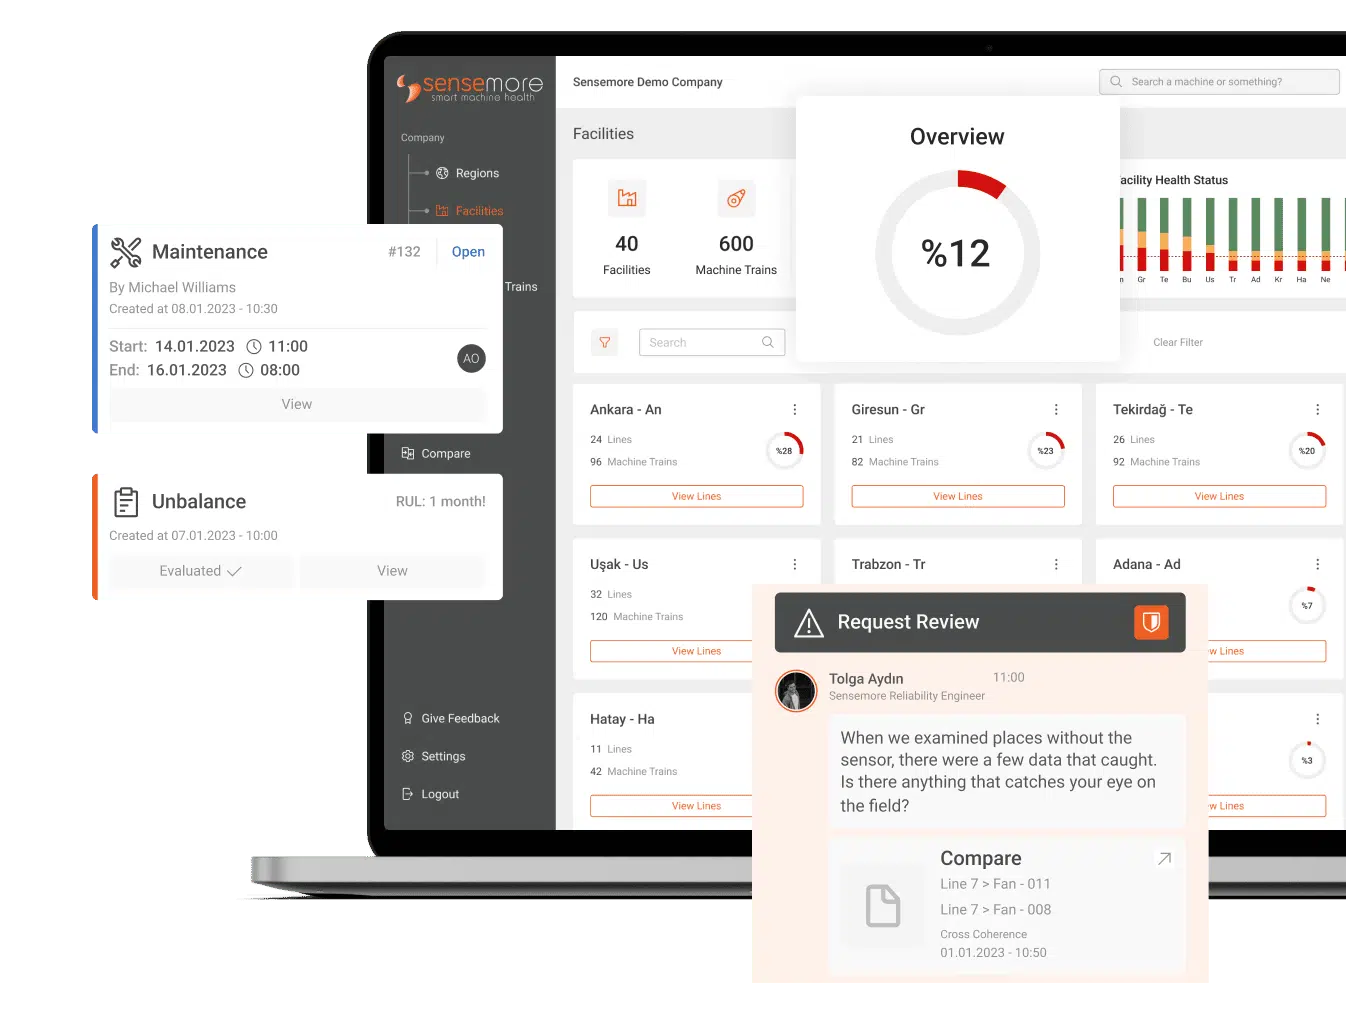
Access to Machine Timeline Panel
The machine timeline panel on the machine detail page can be quickly accessed by clicking on the button with message icon (shown with 17 below) fixed at the bottom right of the page.

Other Screens on Mobile Device
As with other screens, all screens on the LAKE platform, such as Connectivity (shown at 18) and Signal Toolbox (shown at 19), have been adapted to mobile device sizes.
On our Signal Toolbox screen, which is one of the most used screens, the settings area such as telemetry selections and date range selections used when viewing data have been redesigned for a better experience, taking into account mobile usage habits.

Discover Our Platform: LAKE
Sensemore LAKE is the reliability-focused data-driven machine health platform that offers users to create a digital maintenance culture to increase overall efficiency.